UM I actually alternate between a couple tools depending on how rough or polished I want the piece to feel.
For something like this one I used the Brush tool:
And for something cleaner like this one I used the Pencil tool:
I think what a lot of SAI users don’t know about is the stabilizer function which really helps eliminate that kind of wobbly disconnect between your hand and the machine.
With fur, I find that shapes and variety are very important.
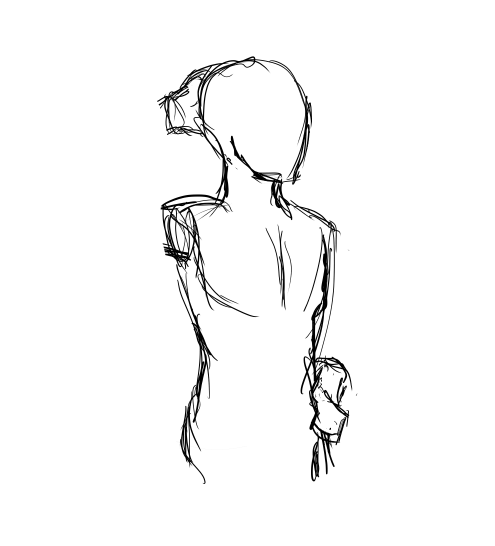
Something like this gets your point across– you can see that it’s fluffy– but the fur itself looks pretty boring and stiff
In comparison, variety really gives character to fur. For animal hair of about this length, I find that thinking of matted fur can help with shapes. Instead of thinking about the hair ends as separate, let them fuse into different curves and straight lines. If it helps, perhaps draw a varied outline of the fur to start and then go back in to break up the shapes in unique ways
How you choose to use your lines can drastically change the texture and overall look of the fur you’re drawing
Highly varied, clumped lines can give an unkempt appearance to fur
But if you want to draw tidier fur instead, more unified and flowing lines will help to give a well-groomed appearance.
Playing with the shapes never hurts!
It’s also important to consider the weight of the fur and/or hair that you’re drawing. Smoother lines on top and more sporadic ones on the ends can help to give a sense of gravity pulling the hair down
As with shorter hair, more uniform will give off a tidier apperance
For really thick or crazy hair, lots of overlapping tends to help!
Sorry this isn’t really too in depth, but I hope it helps!
Want to make this brush? Just make a perfect circle and save it (I call mine “round”) and use it as the bitmap, and copy the settings above. It works pretty nicely 😀
aHHHH HOLY SHIT WHEN DID THIS POST START TRENDING?!
*If English is not your native language, you can download it in other languages.
Please download from the official FireAlpaca websites, because a friend of mine simply googled FireAlpaca and downloaded from some random site, and she got malware! So PLEASE be careful.
FireAlpaca has a suggestion/bug reporting box on their site so you can request features, or let them know if you’re having any issues! Also FireAlpaca works fantastically on Mac computers! (though I will say the only time FA has crashed on me is when I used a Mac, so PLEASE save your work often)
Also, please visit these tumblrs if you do get into using FireAlpaca:
The other day I came across this awesome program by accident
(I don’t even remember what I was actually searching for, but on the several
times I’ve looked for a program like this I’ve had no luck). It’s cool enough that I wanted to share it.
It’s called DesignDoll (website here) and it’s a program that lets you shape and pose a human figure pretty much however you want.
There’s a trial version with no expiration date that can be
downloaded for free, as well as the “pro license” version priced at $79.
I’ve only had the free version for two days so far, so I’m not an expert and I
haven’t figured out all of the features yet, but I’ve got the basics down. The
website’s tutorials are actually pretty helpful for the basics, as well.
Here’s the page for download, which has a list of the
features available in both versions.
There are three features the free version doesn’t have:
Can’t save OBJ files for export
Can’t download models and poses from Doll
Atelier (a sharing site for users; note that the site is in Japanese, though)
It can’t load saved files
The third one means that if you make a pose, save it, and
close the program, you can’t load that
pose/modified model later. You have to start with the default model. I
found that out when I tried to load a file from the day before (this is why
reading is important…). Whether saving your modifications (and downloading models and poses) is worth $80 is up to you.
But, the default
model is pretty nice and honestly if all you’re looking for is a basic pose reference
it should work fairly well as it is. Here’s what it looks like:
There’s a pose tag
that lets you drag each joint into place and rotate body parts. The torso and
waist can be twisted separately, and it seems like everything pretty much
follows the range of movement it would have on an actual human.
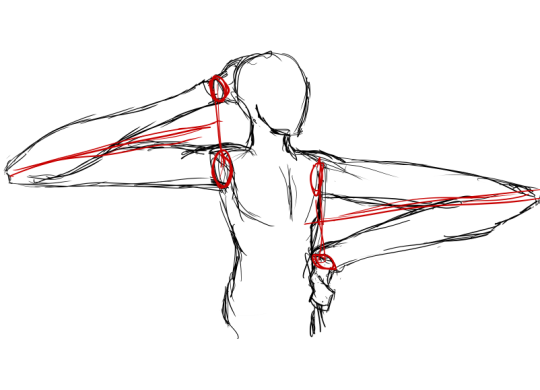
Even the entire shoulder area is actually movable along with the joint! See, like how the scapular area of the back raises with the arm:
The morphing tag
is one of the coolest features, in my opinion. It lets you pick and choose from
a library of pre-set forms for the head, chest, arms, legs, etc. It has some more realistic body shapes in addition to more anime-like ones. Don’t like the
options there? Mix a few to get what you want! Each option has a slider that
lets you blend as much or as little as you want into the design.
So you, too, can create beautiful things like kawaii
Muscle-chan!!
The scale tag
lets you mess with the proportions and connection points of different joints. This
feature combined with the morphing feature not only allows more body shape
variations, but it also means that you can do things like make a more digitigrade
model if you want. (The feet only have an ankle joint, but for regular human poses that’s all that you really need, so whatever.)
Or you can make a weird chubby alien-like thing with giant
hands and balloon tiddies if that’s more your thing.
The ability to pose
hands to the extent it allows is far more than I could have hoped for from
a free program. Seriously, you can change the position of each finger joint individually, as well as how spread out the fingers are from each other. Each crease on the diagram below is a point of movement, and the circles are for spread between fingers.
And to make it a bit more convenient, there’s a library of pre-set hand poses you can pick from as well, and then change the pose from that if you like.
In both versions, you can also import OBJ files from other places for the model to hold, like if you wanted to have them hold a sword or something.
Basically, this program is awesome and free and you should
totally check it out if you want a good program for creating pose references.
I just wanted to add a little more to this. If you have trouble figuring out how light sources work in your drawings this also allows you to choose where to have a light source.
That shaded ball on the left is your light source. You can see how moving the point changed the shadow cast.
Oh and all those other nifty looking things in that bottom bar there, yeah it’s what you think. You can change the model color to one of these presets or even customize your own palette.
Plus for all you lovely people who want something a little more simplified to use as a pose reference
You can turn your model into the classic wire frame.